Sunday 23 February 2014

More Progress

Another good day in the boat today. Two frustrations, the VHF external speaker won't talk VHF - the speaker is fine and I know that because I connected it to my iPhone and blasted Asteroid Galaxy Tour all over the marina. Time for an email to Garmin. The black box sounder won't talk to the plotter but it did before, so I'll have to test the comms cable. However, that didn't keep me down for long. I had some brave things to do!

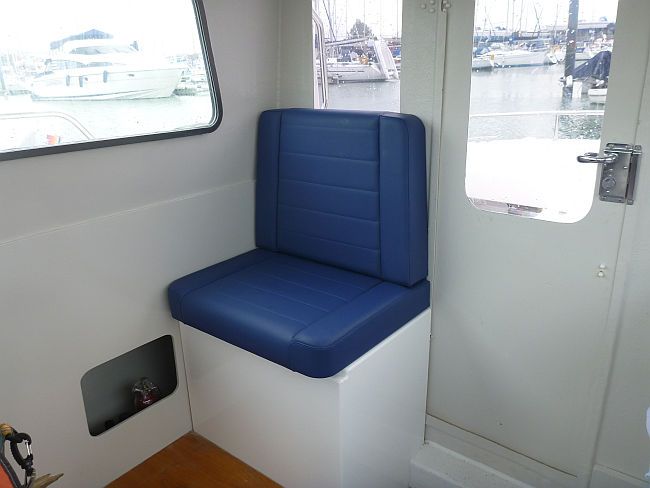
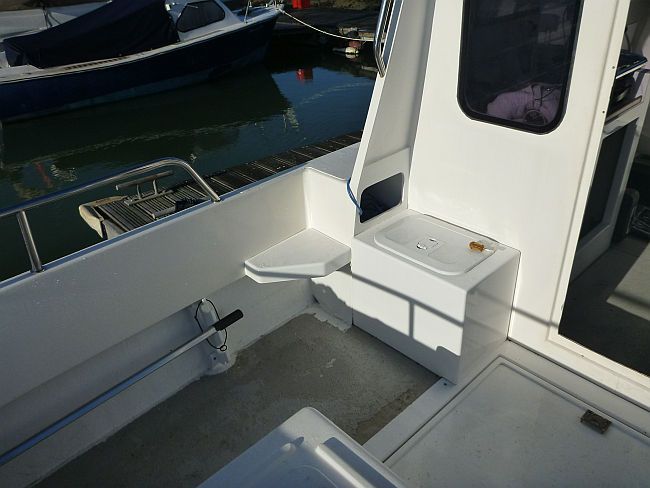
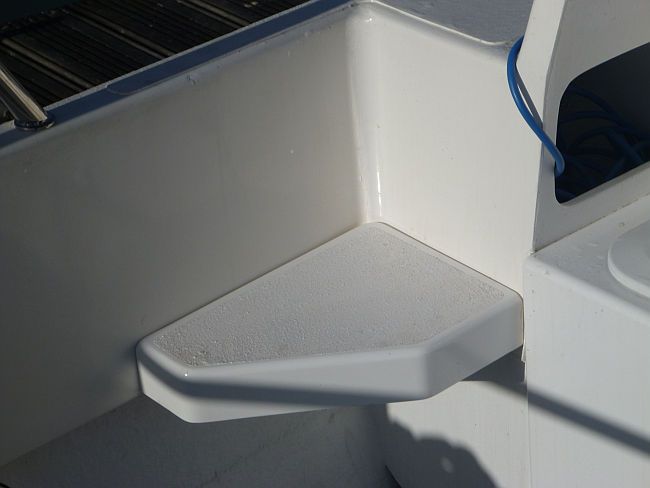
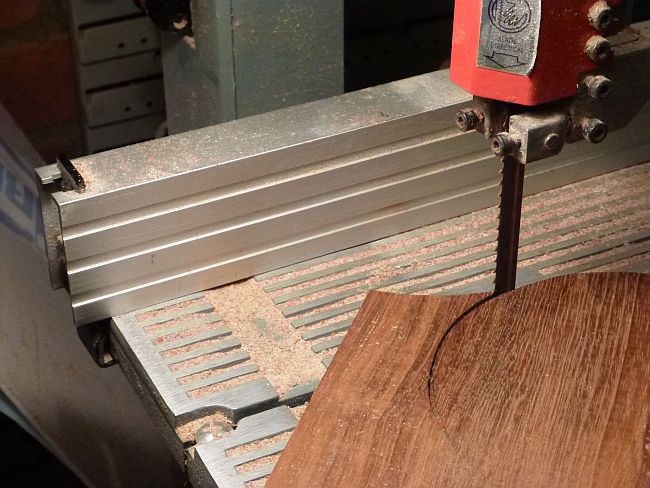
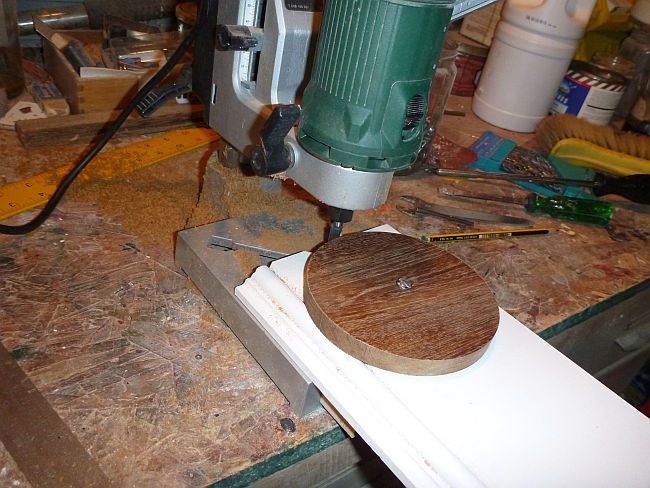
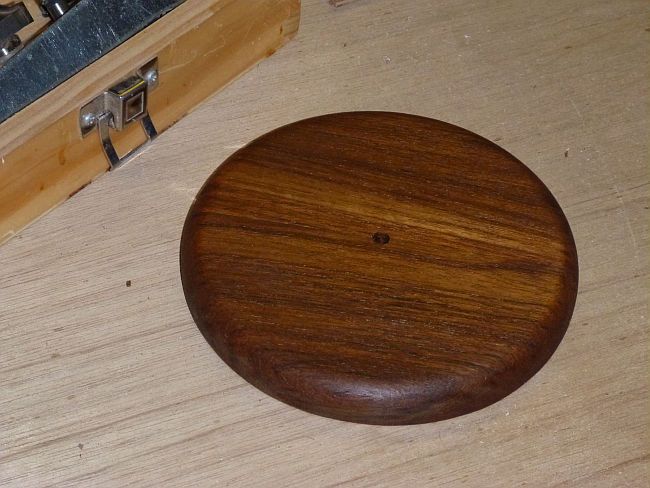
 First job was the remove Garry's seat box, turn it upside down and slice of 90mm. That all went to plan, and the Bosch plunge saw worked a treat. It made hardly any mess, and was very controllable. I trial fitted the seat box lid, and this is a heavy boy because it has to take the KAB seat and rotating base which weighs a lot.
 

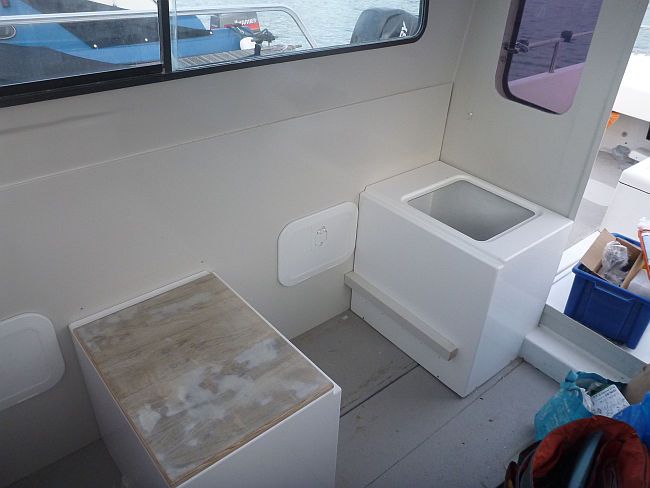
 I also fitted the locker door. I wondered why the guy that did some of the fitting hadn't fitted it, having cut the hole. I found out why - he had cut the hole too close to the seat box. A quick wiz round with the jig saw and all was sorted.

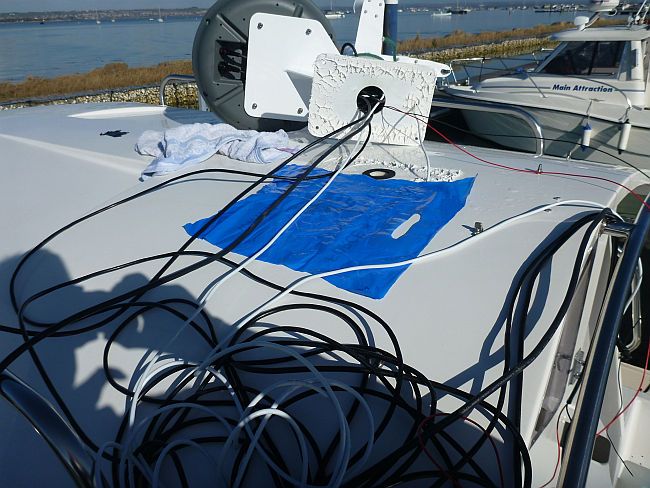
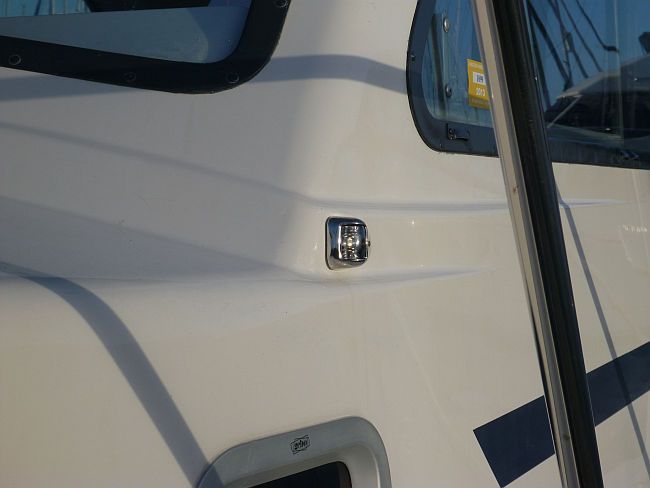
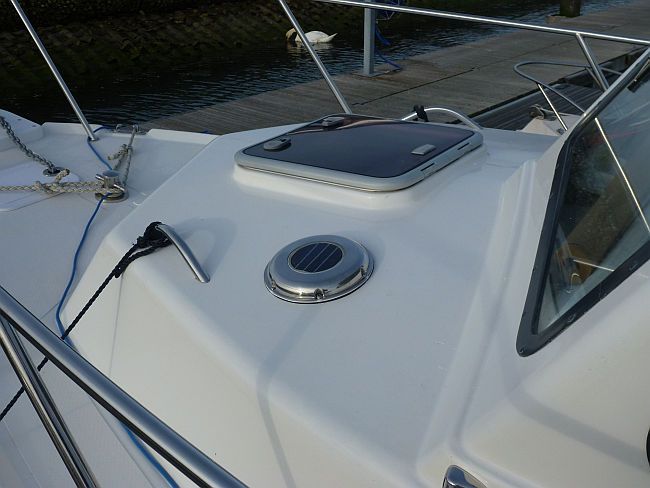
The next brave job was one I had been wimping about for weeks. I had to cut a large hole in the cabin roof to fit a solar powered vent. I was wimping because it not going to be a cut I could hide if I messed up, and I was also slightly worried it might look ugly but in fact it turned out to be very neat. The fan fired up even as I was fitting it and buzzed away extracting air as long as there was daylight. That should keep the cabin sweet.


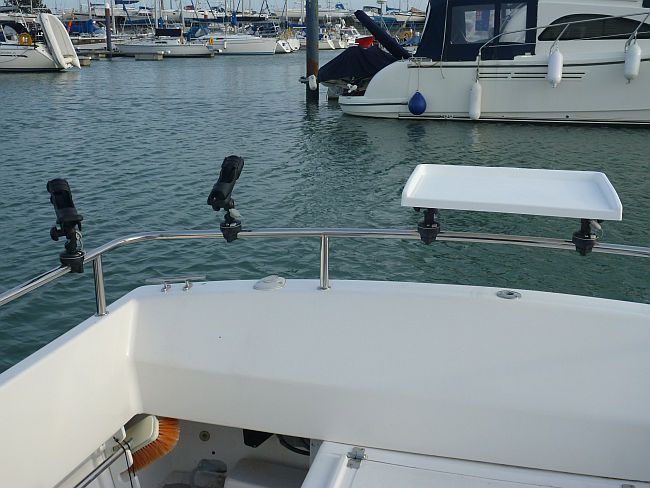
  Then, as we were blessed with no rain, I took time off and did the easy, if monotonous, job of fitting nine Railblaza Star Ports. These can be used to mount rod holders (4), bait table, or anything else you can buy a Star Port thingy for. I cunningly mounted the Star Ports in such a way that I have five different options for where I mount the bait table, and wherever I don't mount the bait table I can mount rod holders. They are well made, very strong and very versatile. I can't wait to test them though!


 Finally, I spent a long time with tape measure and brown paper making templates and measuring, so I can make various bits and pieces for the helm support, headlining, side lining, raised deck and floor.

Tuesday 18 February 2014

A good long day

I had about eight good hours on the boat today. I took the new seat down to try for size, as I have to raise the footrest to suit the cushion when sitting down. I had a few test sittings, very comfy! I measured up to make an attachment bracket for the seat back and a stop to prevent to base sliding out.


The rest of the day was spent finishing off the wiring, so the nav lights, masthead light, deck flood light and one cabin light all work. LED lights all round and no intereference on the VHF with is a relief. Wires are laid to the wheelhouse liner light positions, and the teak rail to hold the headlining is in place. The transducer is installed in its bath of antifreeze, and the cable routed back to the black box. A small piece of headlining is in place behind the cabin door. I used Screwfix micro D conduit to run some wires from behind the galley up to the roof line, only a couple of quid and really neat. I also fitted an external waterproof speaker so I can hear the VHF when I am fishing. The VHF doesn't seem to have a switch to control an external speaker so I switched the live feed to the speaker. However that didn't work so I'll have to do a bit more investigating before I seal it all up behind the headlining.

Finally, a massive vote of praise to Vetus after-sales service. I emailed them about my second wiper motor which is shorting and generally misbehaving, and within hours they emailed back to say they were sending another in the post and would I post the old one to them some time. The new one arrived next day. Fantastic service, not a hint of a quibble!

Sunday 16 February 2014

A whole sunny day!

A whole day with no wind or rain! At last I could work on outside jobs, including Garry's steps ;)  First I had to cure that leaking mast, and I decided to fit a gland between the mast and deck as well as trying to find the original leaks. Belt and braces, but at least I wouldn't be worrying about it. So the mast had to come down. That meant undoing all the wiring I had neatly routed and connected, so I could feed it through the gland.


At least this time it was pleasant on the roof, and I could chat with passing boaties. Finally it was done, all the cables back in place, and it looked just like it did before. Not really very satisfying!


Next job was the handrails. This was another annoying job, because whoever fitted the rails had not cut the projecting threads which were sticking into the wheelhouse and preventing me fitting the headlining. I wrecked a plunge saw in about 30 seconds, note to others - "cuts metal" does not apply to stainless bolts. So they both had to come off. Actually it was a lot easier than expected, and an hour later they were back on - exactly as they looked before.


By now I was desperate to spend hours on something that actually looked different afterwards, so I fitted Garry's steps. They look blooming good and are a delight to step on, no more swinging in off the top rail like a monkey and there is a fair chance I will not fall in the boat like I once fell out of it (in the farmyard fortunately). Here is the general view


and the close-up


The final job was the remove the old, plastic, rather faded navigation lights and replace with stainless, LED lights. Amazingly, the old holes were just covered by the new units and even the wire holes were in the right place, so they were clamped up ready for wiring in during the next rainy work-day.

Tuesday 11 February 2014

A satisfying little evening job

Not all the jobs on this project need to be large to be satisfying. I mentioned earlier I was planning to make a teak boss to mount behind the wheel position to hide a carve-up in the GRP. Here's what I did. I had a nice teak off-cut but it was too narrow and too thick. First job was to mark out and rough cut two semicircles.


It was too thick so I had to slice the half-disks vertically


I then made what my daughter calls a contraption but I prefer to call a very clever jig, to clamp the two halves together while they were glued.


This is what came out in the morning. "You'll see the join," says the wife. "You should have bought a proper piece of wood instead of being a cheapskate".
"Never" says I. "Wait and see."


Now for Contraption Number 2, so I can rotate the disk perfectly while I cut the circle more exactly...


 And then mount the router in an old drill stand and do a similar thing to true the edge and add a nice curve to the top face


 Then for some hand sanding to smooth it all off and its ready for varnishing. "OK, so where's the join then?" Smug face ;)


Sunday 9 February 2014

Two Steps Forward and One Back

I should have called my boat "Two Steps Forward and One Back". I finished off the mast arrangement by deciding to fit a new antenna after all, so I have the original (perfect) 2.4 metre antenna and mount for sale if anyone is interested. If the wind hadn't been an absolute hooley today I'd have flown the house flag (pirate "Fish or Cut Bait") from the back!


 However, the one step back is that the mast leaks, somewhere. It could be the mast light or one of four glands, so when it is less windy I'll have to go up there with the hose and test it. Worst case I have to fit a monster gland inside the bottom of the mast, but I'll only do that as a last resort.

In the meantime I routed the wires down the coach roof, keeping power separate from signal. The radar signal wire is so long it took five trips up and down the roof to loose the extra. Easier than fitting a new Ethernet connector though.


 Scott from One Degree West managed to get the old plastic wheel off (hooray), I tried the new one for size and it looks good. A destroyer type, like my Trophy. I realise I have tried to recreate a number of features from Salar. Scott has blocked out the mechanism behind the bulkhead to move the wheel forward slightly, to make more room for the KAB seat. I'll have to make a round thingy to hide the ugliness that was behind the old helm cover before the wheel can be fitted. I have a nice bit of teak, or I could just slice off the top of the old Teleflex cover. No contest, what else are winter evenings for?


 The rest of the day was wiring, wiring, wiring. There is order in that rat's nest! The worst of it is in fact redundant Yanmar harness, not mine. The NMEA2000 network is now in. The plotter locked on with the new NMEA2000 GPS antenna really quickly, much better than the old one. I fired up the radar too, that looks really cool. I'll have to spend a few hours just getting used to it, even more settings to learn! When all the wiring is complete I will do a major tidy with curly wrap and ties, there is no point doing that while I am adding more.


 The errant wiper motor turned out to have a loose piece of wire filament in the works which must have been shorting. Once that was removed it behaved perfectly in my office so it is refitted, but not yet wired up. So much to do. I did wonder this morning why I didn't go for a boat that was ready to go, maybe I'll answer that when I have a bit more done. I hope the plaice are late this year.

Saturday 8 February 2014

Headlining

I am lucky enough to have a studio in the garden which we use for guests. Even better, it is just the right size to lay out a 2 metre board and spray glue the headlining on it! I have temporarily taken it over for cutting out and fitting the headlining, and a bit of varnishing, on the strict condition from The Management that it is returned to a state suitable for guests before guests come (I have spread the rumour we have Bird Flu). Here is the result of some evenings this week and a morning gluing and stapling. Nice and smooth this time:


Two vinyl headlining boards, cut-outs for LED down-lights (one fitted for sizing) and a strip of varnished teak to hide the join. I have made some H section supports for the teak strip so it will hold the boards down the centre line. The sides will be screwed. I may have to fit some pads to screw into, between that. Tomorrow I'll be doing some very careful measuring, wiring up for the lights and routing all that cable from the mast.

Monday 3 February 2014

Expensive Lesson

Due to other commitments I couldn't get to Southsea this weekend so I did some indoors work instead. The plan was to cover the ceiling panels for the wheelhouse in bioprufe in ermine white which is a vinyl with a denser, cloth backing instead of foam. I had bought 2.5 metres a couple of months back, and therein lies the expensive lesson. I cleaned down the old roof panels, pulled off the original covering, filled holes and trimmed a bit off to allow for a nice teak strip to cover the join. I cut holes for the lights and was all set to spray glue and cover. Unfortunately, the roll of vinyl had rested in a wonky position and a small kink had developed. However much I pressed and smoothed, that kink showed on the otherwise flat vinyl. Lesson learned, buy vinyl only when you need it and keep it rolled perfectly! I ripped the vinyl off to save the ply panel, and today went off to get some more. So not much progress this weekend at all.

To cheer myself up I went to collect the third seat that had been made from matching vinyl. This will be fixed, and opposite the rotating crew seat. Mike Homer in Poole made a brilliant job of making it look part of the family, copying the stitched panels, so it will match the others when all are in position.


Here they are where I am measuring the height difference, as I will have to cut one seat box down 85mm to allow for the turntable and thicker seat, making both seat tops the same height either side of the table. Some time this week I'll be having another go at the ceiling vinyl, hopefully with a happier result. I discussed my ceiling problem with Mike as he is an expert at these things. He confirmed that once vinyl is out of shape you have had it, no amount of coaxing, heating or cooling will make it perfectly flat again.