Have you ever thought that you have left your engine in neutral, only to discover as your boat chugs along that it is still in gear? Me also. Some gear arrangements don't make it feel obvious when the stick is in neutral, with embarrasing consequences when docking. Here's a simple fix if your control box has a starting limit switch, usually used to power a relay and prevent starting the engine in gear. I simply wired in a 12v dashboard indicator light to that switch: Neutral = On. It is a very simple circuit taking power from the Ignition On pole under the engine panel. Now it is really easy to check that I'm in neutral!
Sunday, 10 October 2021
Monday, 13 July 2020
Rail-mount rod holder hack
When the main refit was done in 2013 I installed a series of Railblaza rail sockets around the cockpit rail so I could mount a bait cutting board and rod holders wherever I wanted them. Although they are supplied with gripper tape, I never got them fixed securely enough to stop rotating under load (the load being a large fish running off with the bait!) I was advised to put a piece of rubber inner tube under the mount which I did. However, a combination of time-weakened plastic, the additional layer of material and my brute strength(!) the lower part of the clamp sheared at the thinnest point.
This needed strengthening. I bought a metre of 20mmx3mm 316 stainless (mill finish) and made 10 plates to fit under the 10 clamps. I also bought some longer bolts to accommodate the plate and nut, which is now exposed. By chance, the supplier only had Allen key bolts and I think they look rather good. Memo to self, next time I do this I'll polish the strip before cutting it up - I'll have something to hold! Job done eventually, and so far, no twisting. So far no big fish either, but I live in hope (on both counts).
Monday, 21 May 2018
A fish-finder for the cockpit.
My previous boat had an open wheelhouse so it was easy to see the fish-finder when drifting. Rebel Runner has a bulkhead, so the fish-finder screen is out of sight. Having looked at the cost of a secondhand slave screen, I opted for an entry-level Garmin Striker 4 - less than £130 all in. One of the options was a foam transducer mount for inside the hull. At over £20 for a bit of foam, I thought I could do as well for less. I cut the bottom out of an electrical junction box and Sikaflexed it to the inside of the hull.
I cut some upholstery foam to the size of the box, then cut out a transducer shape in the foam. I filled the space with antifreeze liquid and pressed the transducer into place. This allows for adjustment to keep it vertical on a sloping hull, and there is no damage if I need to remove it. The wire is fed through a standard electrical grommet. Now I can see the fish on the drift!
Monday, 28 December 2015
A seat pedestal to rely on
I am very pleased with my KAB helm seat, it makes the boat feel very grown-up. I originally mounted it on the boat's original (Plastimo again) pedestal but I began to feel it wasn't man enough for the job. It was fully adjustable and had a limited shock absorbing suspension but it wasn't up to KAB standards of ruggedness. It has gone wobbly on me a couple of times which is a very uncomfortable feeling when you need to hang on during a bit of wave bashing. My Christmas present was a new and very sturdy pedestal from the same supplier as the seat. It was the perfect job for an afternoon in the marina. The old pedestal came out, and the new one screwed in place. As I suspected, the holes did not quite align and new ones had to be drilled but nothing showed so that was OK. I am now looking forward to a bit of rough stuff!
New Marine Toilet (bargain!)
I am still doing bits of work from time to time. The sea toilet that came with the boat was a Plastimo model and if you remember an earlier post, had not been very reliable (that's putting it politely). Plus the seat was plastic and wobbly. I researched to the cost of a new seat (£42) and a maintenance kit (£49) and found that I could replace it with a brand new Jabsco compact toilet for £104. No contest! The old loo came out and the new loo went in with little trouble. I had to cut a new hole in the bulkhead for the outlet pipe which came away from the toilet at a different angle, but that was all. Everything connected up and it is now fully functioning, with no leaks or surprising sprays!
Sunday, 13 September 2015
Trim Tabs
I usually lift my boat out of the water in August to re-paint the anti-fouling, have the leg serviced and do any underwater jobs that can only be done on dry land. This year I decided to install trim tabs and after a lot of research, decided on Bennett trim tabs from PH Marine. There is a lot of advice on-line so I was confident I could do the job myself. I had to wait until lift-out until I could measure the transom exactly, and it was just as well I did that before ordering because the top of the actuator where the standard hydraulics runs through is exactly at deck level. Fortunately you can have external hydraulics which is what I ordered. The installation was very straightforward, although the worst bit was, as usual, pulling the boat apart to run the cables through. Eventually all was done: trim tabs installed, connected up, system bled, controls calibrated and all the anti-fouling done. I am looking forward to a test run!
Sunday, 26 July 2015
Cabin Lining
The weather was too bad even for Ben Ainsley today so I spent the afternoon finishing off the hull lining in the cabin. First, the hull sides were covered in closed cell foam, which had to be cut round the chines. This hull has quite deep ridges to cover.
Not so the carpet, which had to go on in one piece to avoid joins. One side is over two metres long, but fortunately the carpet is very floppy and stretchy so it is easier than in could be.
Sunday, 10 May 2015
Flares Locker
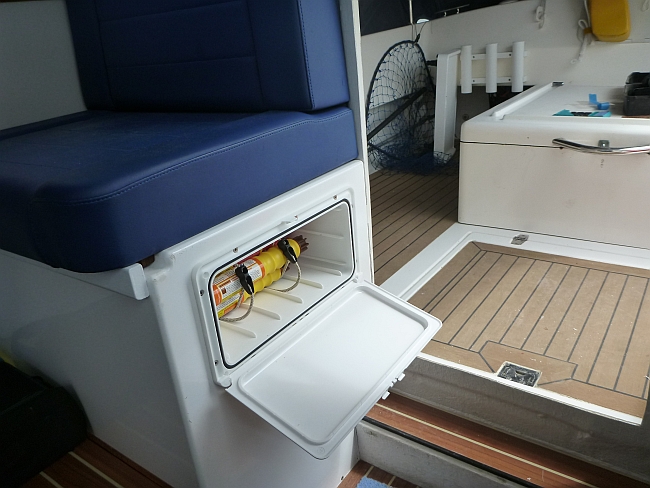
Another small job today, as I was too lazy to get out early for fishing before the cill closed. My box of flares are well buried in a locker and need to be near at hand. I found a self-contained locker and lid that required a cut-out and simply screws in place. After careful measuring I cut the hole with a multi-tool and hole cutters for the corners. It doesn't interfere with the inside space because the top access to the main box is a hole in the centre, so the top corner is dead space.
Sunday, 26 April 2015
Curtain Doors
This might be a bit tarty for some, but this is what I have been doing. Doors are fine but the trouble is they have to go somewhere when they open and that can be a struggle in a small boat. I decided to fit curtain doors to the heads and cabin for privacy when it is needed (by my guests). I borrowed my daughters sewing machine and dragged up memories of making curtains when I bought my first house. The heads curtain was more difficult as it has an angle cut-out to accommodate the slope in the roof. The rail is a smooth plastic dowel, and one side of the curtain is secured by press studs.
When the curtain is closed it is secured by a turnbuckle. The fabric is a polyester marine material.
The other curtain door is between the wheel house and cabin. This has to be removed when not in use so it has an elastic "curtain rail" with hooks at each end, and is hooked to two small rings on the bulkhead.
When the curtain is not in use it is folded up and put out of the way. I made a little draw-string bag for it out of off-cuts.
Now the weather is warmer and drier, I must get on with lining the hull in the cabin area with foam for insulation, followed by carpet from Mega Van Mats. I am procrastinating that one because it will be hard work (and smelly).
Sunday, 15 March 2015
Cabin headlining progress
The cabin headlining is nearly done and was a lot trickier than I thought. Lots of paper templates, trial fitting, back home for trimming, fitting again, even a complete design change halfway through to make the fit more snug. The Lewmar hatch trim kit made life a lot easier but there were a lot of curves to take account of. 8mm ply pads were Sikaflexed to the roof, and the headlining boards screwed to that made of 5mm ply covered in foam-backed vinyl. The raw fibreglass coach room now looks cosy.
The original raw cabin interior looked like this:
Next step is to glue high density foam to the hull sides, then glue van lining carpet to the foam. I can only do that when the weather is warmer and drier, to make sure there is no risk of condensation getting in the way of the adhesive.
Sunday, 25 January 2015
Progress report, January 2015!
This thread has been quiet for a while as I have been working on lining out the cabin. Not much to show yet! This is my brother helping to measure for the paper templates
This and other jobs were interrupted by an annoying problem with fuel starvation which took a long time to track down. It turned out to be a string of silicone or PTFE in the fuel pipe which bunched up under flow pressure. All sorted now!
The other projects were a bit fiddly. I had installed a Wema steering sender gauge so I could tell where my outdrive was pointing. This is particularly useful when docking. It involved fitting a sender unit, but the transom area is nearly inaccessible and the Mercruiser steering yoke is tiny and had nothing to fix it to. I ended up fitting an access hatch in the rear cockpit side, which was needed anyway to access the power steering, and an elaborate bent brass arm fitted to the steering yoke. This links via a stainless rod to the Wema sender, which I have mounted on a little shelf.
The gauge now works!
Another job that should have been easy was to fit a remote switch with timer delay for the cockpit light. My thinking was that it would be convenient if when I arrived in the dark I could switch the cockpit light on with a button on the key fob, even if the boat power was off. When leaving, wouldn't it be cool to do the same while I lock up, and the light would switch itself off after 40 seconds? I reasoned that this would only need a timer delay like they have for car lights, and a remote switch. Both are cheap and plentiful in eBay and Amazon. Here is what I bought:
The delay module didn't have a box so I used a Maplins project box.
The receiver and delay were wired up with a fused live feed directly from the battery, by-passing the battery master. This switch is in parallel to the normal switch for the cockpit light.
There is a board full of electrickery under the galley, I mounted them there.
The receiver and delay were wired up with a fused live feed directly from the battery, by-passing the battery master. This switch is in parallel to the normal switch for the cockpit light.
There is a board full of electrickery under the galley, I mounted them there.
Press it and the cockpit light comes on for 40 seconds then goes off.
You may notice that the remote unit fitted is not the same as the one in the earlier photo. That one was unreliable, it would work fine then go on strike. I bought another, that one did not work at all. I am very grateful for Dave (of this and the Solent forum) who took both units apart and remade all the solder joints so they worked. The power of the internet! You buy something from China then someone you would never otherwise have met is a wiz at soldering and can make it work for you. I love this technology.
Sunday, 19 October 2014
Finishing off some old jobs
I am starting to run out of jobs! Strange feeling. The cabin lining will have to wait until next summer as I need warm dry weather to cut out the anchor locker hatch and glass over it. Recent small jobs were: finishing plumbing in the hatch drains (involved removing batteries and much wriggling in small spaces); smartening the cabin step, finishing lining the heads (loo) and installing a bilge monitor system. This warns if the bilge pump is running and also to warn if the pump has run while the boat was unattended. If you want to make one yourself, I have put full instructions here: http://www.boat-angling.co.uk/Hints_and_Tips/bilgemonitor.htm It looks like this.
Sunday, 21 September 2014
Fishing - or I could call it testing
Last weekend I managed to get half the hatch drain plumbed in, but I will have to remove the batteries to get at the other side and involves removing an unnecessarily large battery retainer just to get them out. This weekend's weather was too good to miss so that job can wait. I took Rebel Runner out fishing and here is proof that there is fish slime on that deck:
Some observations on recent additions: the new through-hull transducer was excellent, it held a strong bottom signal at all speeds. Or it did after I realised I had set it to a max depth of 10 feet and forgot to reset it to Auto, resulting in a long period of blank screen. The Garmin 551 Downvu works well, although the Flag Theofano wreck is still a lump. I will have to find something more interesting to look at. Finally, the outdrive leg trim sensor is now all wired up so I played with the trim. Unlike my previous deep vee hull, the higher the trim the worse the performance. Trimmed to midway, it wouldn't go faster than 13.6 knots. Trimmed nose down it immediately flew to 20 knots which is dramatic. I have been looking at Bennet trim tabs to help adjust the list to port at full throttle. They may also help fine-tune the bow attitude. I think I will fit those next lift-out.
Sunday, 14 September 2014
Night job...
And the job I couldn't do earlier - the extra long skin fitting turned up from ASAP Supplies dead on time. I had to buy a costly bronze one but it was a perfect fit. Launch was booked for Friday so my only window was Thursday night. It took three goes to get the hole cutter through 65mm of transom but it went through, then a lot of grunting and wriggling to get the securing nut done up, as it was behind the engine and exhaust. After that it was a simple matter to screw on the scupper fitting over it. I had made a spacer to clear the skin fitting by cutting up a chopping board. My wife keeps wondering where the boards are going. I fitted the hose on the inside and looped it up to keep the water out until I can get under the hatch to connect the other end. All this with a head torch as the work lamp was blinding me!
Sunday, 7 September 2014
Annual antifouling lift-out (already???)
It's been a year! About this time last year Rebel Runner came over from Cowes in her "raw" state, for an engine service, survey and antifouling. A year later she needs antifouling again so she has been lifted for the annual work. This was the weekend of hard graft, trying to cram in all the jobs that can only be done out of the water. Firstly, antifouling. I thought that would be simple but I noticed the scum lines on each side were different. Worrying about a list, I measured them and found the port waterline a good two inches lower amidships. That meant I had to measure up, mark, rub, prime and only then start antifouling again. As a ruler I used a length of plastic conduit as the cheapest long straight bendy thing in B&Q (79p). In between coats of boot topping I installed the transducer for the Garmin 551dv:
Problem #1: Unfortunately the cable was too short so I have to order an extension. At least that won't stop anything else.
Next job was to install the Airmar through-hull transducer. This involved drilling a 60mm hole (scary) and a tile drill was perfect. Problem #2: the transducer nut is three inches across and nothing I had was big enough, and nothing in B&Q either. Problem solved the following morning by using a G-clamp as a spanner.
Then a polish, I used Farecla Hull Restorer which includes a wax. Shiny or what?
The next job was the fit the transom drain outlet for Garry's hatch. Problem #3: the transom is 65mm thick!!! My skin fitting was standard (30mm) so a quick order to ASAP Supplies for a longer one is required. Fingers crossed they do their usual amazing service and I'll receive it in time for an evening job.
Final job was a filler really, I installed a mount for my iPad. I had spent a long time wondering where to put it, and this is the result. I cut part of the mount off and screwed it through the wheelhouse front. There is a dome nut outside but you can barely see it.
Just as I was clearing up on Sunday evening there was a knock on the hull and a tired looking Steve was there with a gift of two bass! What a nice pontoon neighbour. He had been fishing since Friday hence the look, hauling bass for three days can do that to a man. Let's hope everything comes together by Friday so I can get out to them too. Thanks again Steve!
Problem #1: Unfortunately the cable was too short so I have to order an extension. At least that won't stop anything else.
Next job was to install the Airmar through-hull transducer. This involved drilling a 60mm hole (scary) and a tile drill was perfect. Problem #2: the transducer nut is three inches across and nothing I had was big enough, and nothing in B&Q either. Problem solved the following morning by using a G-clamp as a spanner.
Then a polish, I used Farecla Hull Restorer which includes a wax. Shiny or what?
The next job was the fit the transom drain outlet for Garry's hatch. Problem #3: the transom is 65mm thick!!! My skin fitting was standard (30mm) so a quick order to ASAP Supplies for a longer one is required. Fingers crossed they do their usual amazing service and I'll receive it in time for an evening job.
Final job was a filler really, I installed a mount for my iPad. I had spent a long time wondering where to put it, and this is the result. I cut part of the mount off and screwed it through the wheelhouse front. There is a dome nut outside but you can barely see it.
The iPad mount clamps on the cog and is still fully adjustable.
Just as I was clearing up on Sunday evening there was a knock on the hull and a tired looking Steve was there with a gift of two bass! What a nice pontoon neighbour. He had been fishing since Friday hence the look, hauling bass for three days can do that to a man. Let's hope everything comes together by Friday so I can get out to them too. Thanks again Steve!
Sunday, 31 August 2014
More progress and a bonus
A successful day on several fronts. One unexpected bonus was that I got my trim gauge working. I had given up thinking the sender was kaput but I was doing a tidy of wires before I boxed in the panel behind the dash and I noticed...a stray power wire. Gauges do not work without power. I have no idea why I hadn't connected that but now it is connected and now the gauge works. So simple. This is what the wiring looked like before....
Finally I fitted some neat clips to hold the fenders on the rails. When I have to tie on or untie six fenders on my own before coming up the channel I can be swept a couple of hundred yards in the Langstone Run, clipping these on should make that job a doddle.
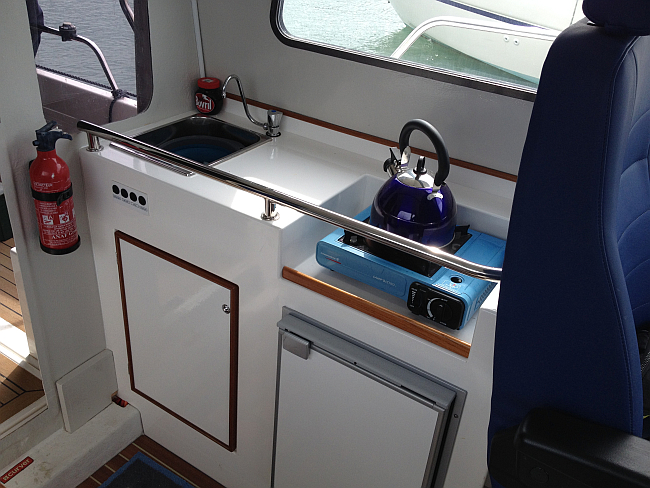
When I was looking for photos of Garry's galley in its finished condition I realised I hadn't any. Here are a couple of shots. I am really pleased with it.
Finally I fitted some neat clips to hold the fenders on the rails. When I have to tie on or untie six fenders on my own before coming up the channel I can be swept a couple of hundred yards in the Langstone Run, clipping these on should make that job a doddle.
When I was looking for photos of Garry's galley in its finished condition I realised I hadn't any. Here are a couple of shots. I am really pleased with it.
Monday, 25 August 2014
How not to test a loo
Been quiet for a bit, family visits and all that but I have been doing a few jobs, including painting the heads with Jotun Hardtop two pack in white. I'll add a fiddle rail in teak rather than box in that useful shelf. I also plan to put a curtain over the door rather than a hard door as it is very cramped in there.
It went a bit quiet and an hour later something needed to be done Time to test the loo! What could possibly go wrong? Water pumped in fine. Did the deed. One pump. Fine. Two pump. Fine. Three pump. Resistance! Hard pump. And with that a 360 degree Catherine wheel of you know what came out of the back of the pump arrangement. I was then faced with a loo bowl full of brown otters and a speckled effect white Jotun loo cubicle. Nothing for it but to get bucket, rubber glover and bleach spray and get to work. Not great as by now it was blowing a beam F3. After all was cleaned up I left it until I got back to the marina before investigating further. Meanwhile I had caught another bass on BBQ pout! Result. When I finally got back in the berth, all I needed to do was tighten up all the screws on the pump and it pumped through fine. I may test it with something else, not poo, next though.
I tested the loo by pumping water in and pumping water out. All fine. On Sunday I decided to go fishing rather than spend the day fitting things so I headed out to find mackerel. No joy at all so rather than waste time I went straight to my mark and used frozen squid. Pretty soon I had a few small pouting so one went back down again barbecue-style. This is the result. First serious guts on the deck! 7lb 8oz
It went a bit quiet and an hour later something needed to be done Time to test the loo! What could possibly go wrong? Water pumped in fine. Did the deed. One pump. Fine. Two pump. Fine. Three pump. Resistance! Hard pump. And with that a 360 degree Catherine wheel of you know what came out of the back of the pump arrangement. I was then faced with a loo bowl full of brown otters and a speckled effect white Jotun loo cubicle. Nothing for it but to get bucket, rubber glover and bleach spray and get to work. Not great as by now it was blowing a beam F3. After all was cleaned up I left it until I got back to the marina before investigating further. Meanwhile I had caught another bass on BBQ pout! Result. When I finally got back in the berth, all I needed to do was tighten up all the screws on the pump and it pumped through fine. I may test it with something else, not poo, next though.
Wednesday, 6 August 2014
Various jobs and a short cruise
After a gap in reports due to a holiday, I spent a morning on Rebel Runner before taking her out on a little trip in the afternoon. I had been in California and among other toys I brought back a lure and trace holder, which I cut in two and fitted each side of the wheelhouse "wings". In fact, having reflected on how simple this is, it could easily be made from right angled plastic strip (less than £2 from B&Q) with small holes drilled in the sticking-out part and the flat glued to the boat with Sikaflex.
The next job wasn't so easy. The hatch in the cockpit is a heavy beast and if it fell shut it could be dangerous. I bought a heavy-duty spring to hold it up but unfortunately there is nothing to bolt it to at the side of the hatch as the gutter forms the rim. I made up a block of wood and intended to glass it under the gutter. Have you ever tried glassing upside down underneath yourself, where you can't see the back of it? Worse, every time I put a layer of mat on it slumped down. Eventually I decided to do it in stages, here are two layers on, another to go then a flow coat. Who would have thought such a small thing was so tricky.
Next job was a simple one - I had applied for a Small Ships Register number and it arrived a while back. It has to be displayed in 30mm text on each side, so I ordered vinyl lettering from The Sign Man (who supplied the boat name lettering) . I applied them to the stern quarter.
The next job wasn't so easy. The hatch in the cockpit is a heavy beast and if it fell shut it could be dangerous. I bought a heavy-duty spring to hold it up but unfortunately there is nothing to bolt it to at the side of the hatch as the gutter forms the rim. I made up a block of wood and intended to glass it under the gutter. Have you ever tried glassing upside down underneath yourself, where you can't see the back of it? Worse, every time I put a layer of mat on it slumped down. Eventually I decided to do it in stages, here are two layers on, another to go then a flow coat. Who would have thought such a small thing was so tricky.
At 2pm the marina gate opened but it was blowing a good F5 and all the charter boats were tucked up in their berths. Fishing seemed unlikely. We have family arriving from the USA soon and I am required to transport some of them to Bembridge for a family meet-up, so I thought I had better do a trial run as I haven't been to Bembridge harbour for a while. Rebel Runner behaved perfectly heading into a very short sea and 20 knot winds, feeling very steady and surprisingly dry, most of the spray was deflected well astern. As you could have guessed, Bembridge on a Sunday in Cowes week was packed, it felt like the M25 going in. Once I found the visitor's berths I turned round, job done, only to find a 30 foot yacht reversing at 90 degrees across the channel which is about 30 feet 6 inches wide. I have no idea what was going on, I just found a gap and went through. I had heard mackerel were appearing at The Forts so I headed over. First drop, a mackerel, then nothing for the next several drifts but it was very uncomfortable in the wind. At least I could claim fish guts on that flashy deck at last! Back to the marina for a through clean down, now she's all ready for visitors.
Sunday, 29 June 2014
Rebel Runner is a Ship, and a quieter one too.
A couple of things to report. Firstly, Rebel Runner is officially a ship! The certificate from the Register of British Ships Part III arrived today, not much - just a laminated A6 card - but she has a number and I will have to get it made up to stick on the side.
The other bit of progress was completing the new gutter on the old engine casing. The previous one was placed under the hinge crack to prevent water dripping onto the engine which worked fine until you opened the lid, when all the water ran onto the engine because the gutter was not wide enough. I cut the old one off and found it was just a piece of poly pipe laminated over. With much advice from Garry I used an old bed slat as a mould and laminated three layers of mat onto it. After it cured I popped it out, trimmed it up and bonded it in place with paste. I then put another three layers on. Trimmed again, filled various gaps and flo coated over. I also filled surplus screw holes and gel coat chips while I was about it. Sounds very cool and easy? No so. Garry will know, he had loads of texts and questions including when the parcel tape used to release the mould went all wrinkly and the result was a mess which needed much filling and sanding. Garry would have done it in minutes, I took half a day plus several evenings but here is the result.

Next job was to fit the soundproofing mat I had bought on a special offer way back. One and a half sheets did the lid, and the three sides consumed most of two more. I finished the edges off with metal tape. You are supposed to use it for joining two sheets but I had plenty and it finished it off rather well.

The engine started first turn as usual, it is still a growler but what do you expect for 260HP. I have done all I could. I took Rebel Runner out for a quick spin round the harbour entrance but no mackerel were evident so still no fish guts on that deck I'm afraid. Final job was to rub down and polish some gel coat patches on the roof then she was all tucked up ready for next time.
P.S.
This is what it looked like when I bought it.
The other bit of progress was completing the new gutter on the old engine casing. The previous one was placed under the hinge crack to prevent water dripping onto the engine which worked fine until you opened the lid, when all the water ran onto the engine because the gutter was not wide enough. I cut the old one off and found it was just a piece of poly pipe laminated over. With much advice from Garry I used an old bed slat as a mould and laminated three layers of mat onto it. After it cured I popped it out, trimmed it up and bonded it in place with paste. I then put another three layers on. Trimmed again, filled various gaps and flo coated over. I also filled surplus screw holes and gel coat chips while I was about it. Sounds very cool and easy? No so. Garry will know, he had loads of texts and questions including when the parcel tape used to release the mould went all wrinkly and the result was a mess which needed much filling and sanding. Garry would have done it in minutes, I took half a day plus several evenings but here is the result.
I took the engine casing back to the boat on Sunday, and trial fitted. As suspected, the extra layers of mat did make it jam when I tried to slot it in but a bit of grinding out fixed it. All polished:
Next job was to fit the soundproofing mat I had bought on a special offer way back. One and a half sheets did the lid, and the three sides consumed most of two more. I finished the edges off with metal tape. You are supposed to use it for joining two sheets but I had plenty and it finished it off rather well.
The engine started first turn as usual, it is still a growler but what do you expect for 260HP. I have done all I could. I took Rebel Runner out for a quick spin round the harbour entrance but no mackerel were evident so still no fish guts on that deck I'm afraid. Final job was to rub down and polish some gel coat patches on the roof then she was all tucked up ready for next time.
P.S.
This is what it looked like when I bought it.
Subscribe to:
Posts (Atom)